Vandercook 15-21
Cylinder guide adjustment shims
03/04/10 08:34
Using shims to adjust the cylinder paper guides:
It’s always bothered me that the cylinder paper guides never showed the same number (ideally 0), when the paper was aligned with the etched line. This makes it more trouble to keep the paper even when making slight adjustments. I decided to adjust them, but they appear to just be threaded studs and a guide nut displaying numbers, even when the tympan clamp bar is removed. This seems to be confirmed by diagrams I’ve seen.
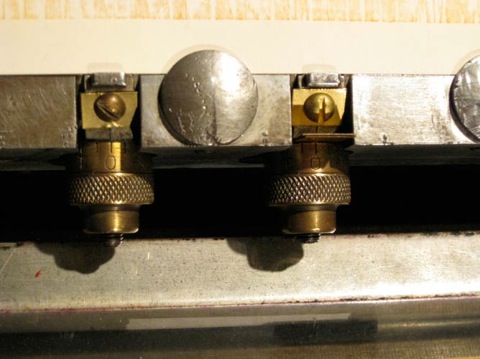
So, I decided to shim them. With lead type there is plenty of shim material in small thicknesses in the form of brass and copper spacing material. Placing a piece of paper in the grippers I aligned it with the etched line and moved each guide until it was just touching the paper. Only one guide read “0”. Taking some brass and copper spacing, I unscrewed the knob until the paper stop reached the end of its travel, allowing a space in which to insert the spacing. Then I experimented with various spacing until the number read “0” (or as close as possible) when screwed up to the paper. Here, the right guide required 1 brass and a copper.
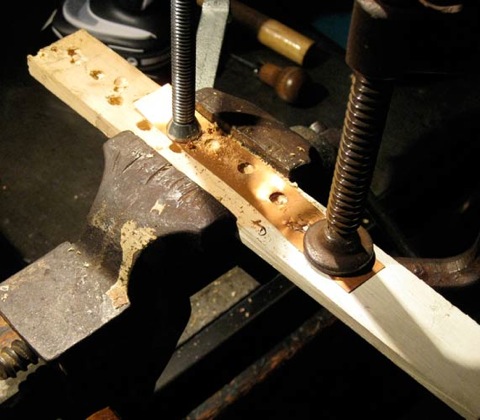
With the necessary shim depths noted for each guide, I took a piece of copper ‘leading’ and measured it out to drill, so that the finished product could be cut into washers to go over the studs (2 coppers are equal to 1 brass). Leading is 3/4” which is very close to the outside diameter of the guide nut. I then set up a system to hold it down while drilling, which consisted of a small block of wood in a vise with two C-clamps affixing the copper. This is necessary because the copper is so thin that it will just ravel up the drill bit if not secured. The size needed is 5/16” but I only had 1/4” so just reamed them out a bit.
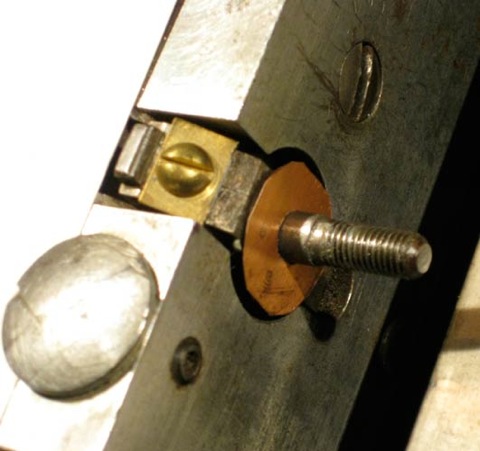
I then trimmed the drilled copper into approximate circles with tin snips and rubbed out any burrs with a hammer against a flat part of the vise. Here are the washers over the studs, awaiting the guide nut for completion. This would also be a good time to grease the guide nut surface in contact with the washers and the stud threads for ease of future operation.
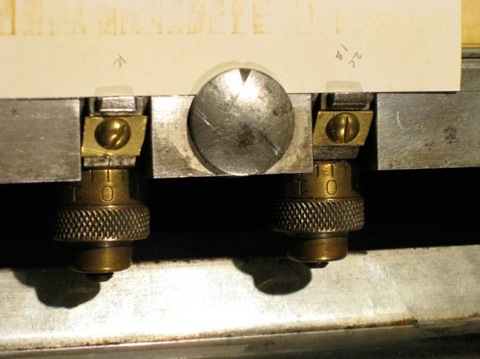
The finished guides with the washers: barely noticeable but reading “0”. On the right and just in front of the paper one can just discern the etched line.
 Read More...
It’s always bothered me that the cylinder paper guides never showed the same number (ideally 0), when the paper was aligned with the etched line. This makes it more trouble to keep the paper even when making slight adjustments. I decided to adjust them, but they appear to just be threaded studs and a guide nut displaying numbers, even when the tympan clamp bar is removed. This seems to be confirmed by diagrams I’ve seen.
So, I decided to shim them. With lead type there is plenty of shim material in small thicknesses in the form of brass and copper spacing material. Placing a piece of paper in the grippers I aligned it with the etched line and moved each guide until it was just touching the paper. Only one guide read “0”. Taking some brass and copper spacing, I unscrewed the knob until the paper stop reached the end of its travel, allowing a space in which to insert the spacing. Then I experimented with various spacing until the number read “0” (or as close as possible) when screwed up to the paper. Here, the right guide required 1 brass and a copper.
With the necessary shim depths noted for each guide, I took a piece of copper ‘leading’ and measured it out to drill, so that the finished product could be cut into washers to go over the studs (2 coppers are equal to 1 brass). Leading is 3/4” which is very close to the outside diameter of the guide nut. I then set up a system to hold it down while drilling, which consisted of a small block of wood in a vise with two C-clamps affixing the copper. This is necessary because the copper is so thin that it will just ravel up the drill bit if not secured. The size needed is 5/16” but I only had 1/4” so just reamed them out a bit.
I then trimmed the drilled copper into approximate circles with tin snips and rubbed out any burrs with a hammer against a flat part of the vise. Here are the washers over the studs, awaiting the guide nut for completion. This would also be a good time to grease the guide nut surface in contact with the washers and the stud threads for ease of future operation.
The finished guides with the washers: barely noticeable but reading “0”. On the right and just in front of the paper one can just discern the etched line.
Read More...0 Comments
Trip arm pad
01/04/10 22:17
Using a piece of cork to replace the trip arm’s missing pad:
Our press has been missing a pad for the return trip arm ever since we got it and would make a metal on metal clank every time the end of travel was reached. Our press has two of these arms, allowing for shorter travel for shorter forms (one doesn’t have to go to the end of the bed). The noise made it obvious when it was time to return the cylinder, but metal on metal noises aren’t pleasant and often indicate a problem, so I decided it was time to fix it.
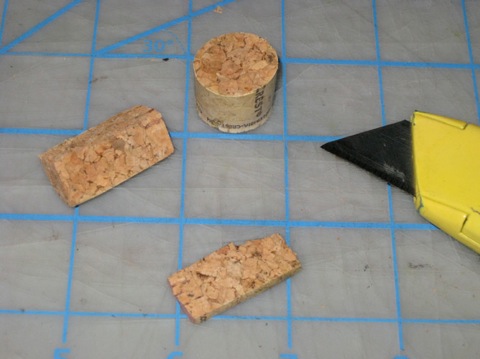
I first held the arm down so it was parallel to the stop to see how thick the pad had to be, then measured the stop to which it would be adhered. Then I cut a wine cork to these dimensions and installed it with double stick tape.
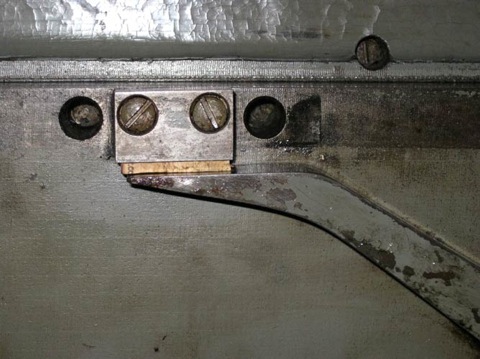
This shows the cork installed. Now it’s very quiet so we have to listen carefully to know when the end of travel is reached!
 Read More...
Our press has been missing a pad for the return trip arm ever since we got it and would make a metal on metal clank every time the end of travel was reached. Our press has two of these arms, allowing for shorter travel for shorter forms (one doesn’t have to go to the end of the bed). The noise made it obvious when it was time to return the cylinder, but metal on metal noises aren’t pleasant and often indicate a problem, so I decided it was time to fix it.
I first held the arm down so it was parallel to the stop to see how thick the pad had to be, then measured the stop to which it would be adhered. Then I cut a wine cork to these dimensions and installed it with double stick tape.
This shows the cork installed. Now it’s very quiet so we have to listen carefully to know when the end of travel is reached!
Read More...