New crankset for the KHS
19/09/10 14:56 Filed in: Cycling
Since purchasing the KHS I have wanted to replace the crankset, which was a cheap triple with riveted construction. I didn’t think I needed the smallest ring, and I wanted to be able to change the chainrings as they wore or I desired a different gearing. Plus, the triple was ugly and heavy.
I found an inexpensive but decent crankset on Ebay, an FSA Vero “compact”(50/34), giving roughly the range of a triple but with only two rings. A problem I foresaw when I looked at a gearing chart was that the gear I often used was a combination of either the large ring in front and a largeish ring in the rear, or vice versa. Neither of these combinations is optimum for decreased wear or mechanical efficiency. But, the part was barely used and very inexpensive, so I thought I’d give it a try.
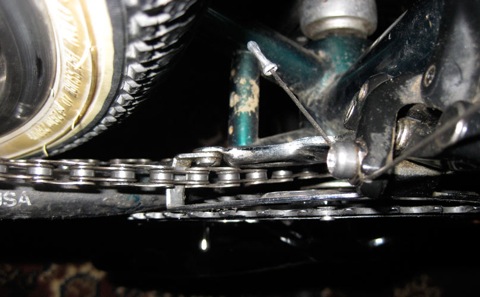
On the test fit, I found that the present bottom bracket spindle was too short and the chainrings were going to strike the chainstay even before they were tightened. One can still see the old crank on the other side.
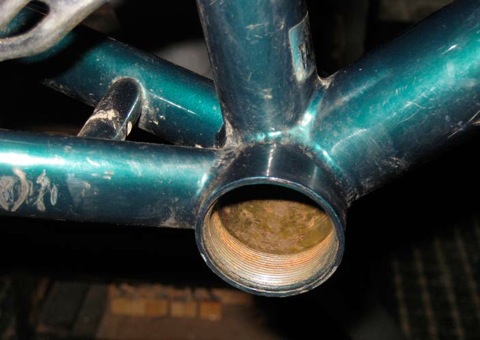
After removing the bottom bracket, I found a lot of rust in the bottom bracket shell. I do like that intense color next to the green frame and black background though!

With the bottom bracket shell cleaned and some WD40 sprayed down the connecting tubes to delay subsequent rust, I was ready to install a bottom bracket with a slightly longer spindle (from 110 to 114, the brand being Shimano and luckily one of the older ones with the metal cups on both sides).
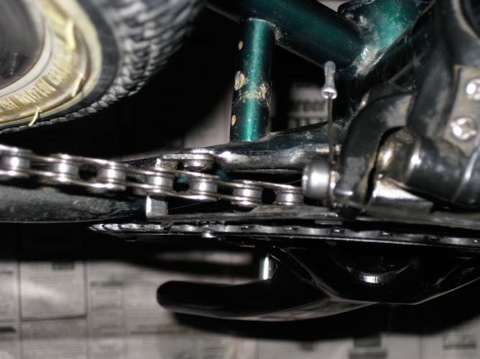
On the far left of this shot, one can see marks on the chainstay from a previous crankset which was too close.
Here is the crankset installed. The large chainring is just missing the chainstay and the chainline is pretty good. I put some masking tape on the chainstay where the teeth could strike and it was only slightly dirty on the inner ring after a ride which included some climbs, so I’m satisfied for now, though at some point I might get a large ring with less teeth to make it more useful. To see the whole bike in contrast to the original shot, go here.
I found an inexpensive but decent crankset on Ebay, an FSA Vero “compact”(50/34), giving roughly the range of a triple but with only two rings. A problem I foresaw when I looked at a gearing chart was that the gear I often used was a combination of either the large ring in front and a largeish ring in the rear, or vice versa. Neither of these combinations is optimum for decreased wear or mechanical efficiency. But, the part was barely used and very inexpensive, so I thought I’d give it a try.
On the test fit, I found that the present bottom bracket spindle was too short and the chainrings were going to strike the chainstay even before they were tightened. One can still see the old crank on the other side.
After removing the bottom bracket, I found a lot of rust in the bottom bracket shell. I do like that intense color next to the green frame and black background though!
With the bottom bracket shell cleaned and some WD40 sprayed down the connecting tubes to delay subsequent rust, I was ready to install a bottom bracket with a slightly longer spindle (from 110 to 114, the brand being Shimano and luckily one of the older ones with the metal cups on both sides).
On the far left of this shot, one can see marks on the chainstay from a previous crankset which was too close.
Here is the crankset installed. The large chainring is just missing the chainstay and the chainline is pretty good. I put some masking tape on the chainstay where the teeth could strike and it was only slightly dirty on the inner ring after a ride which included some climbs, so I’m satisfied for now, though at some point I might get a large ring with less teeth to make it more useful. To see the whole bike in contrast to the original shot, go here.